
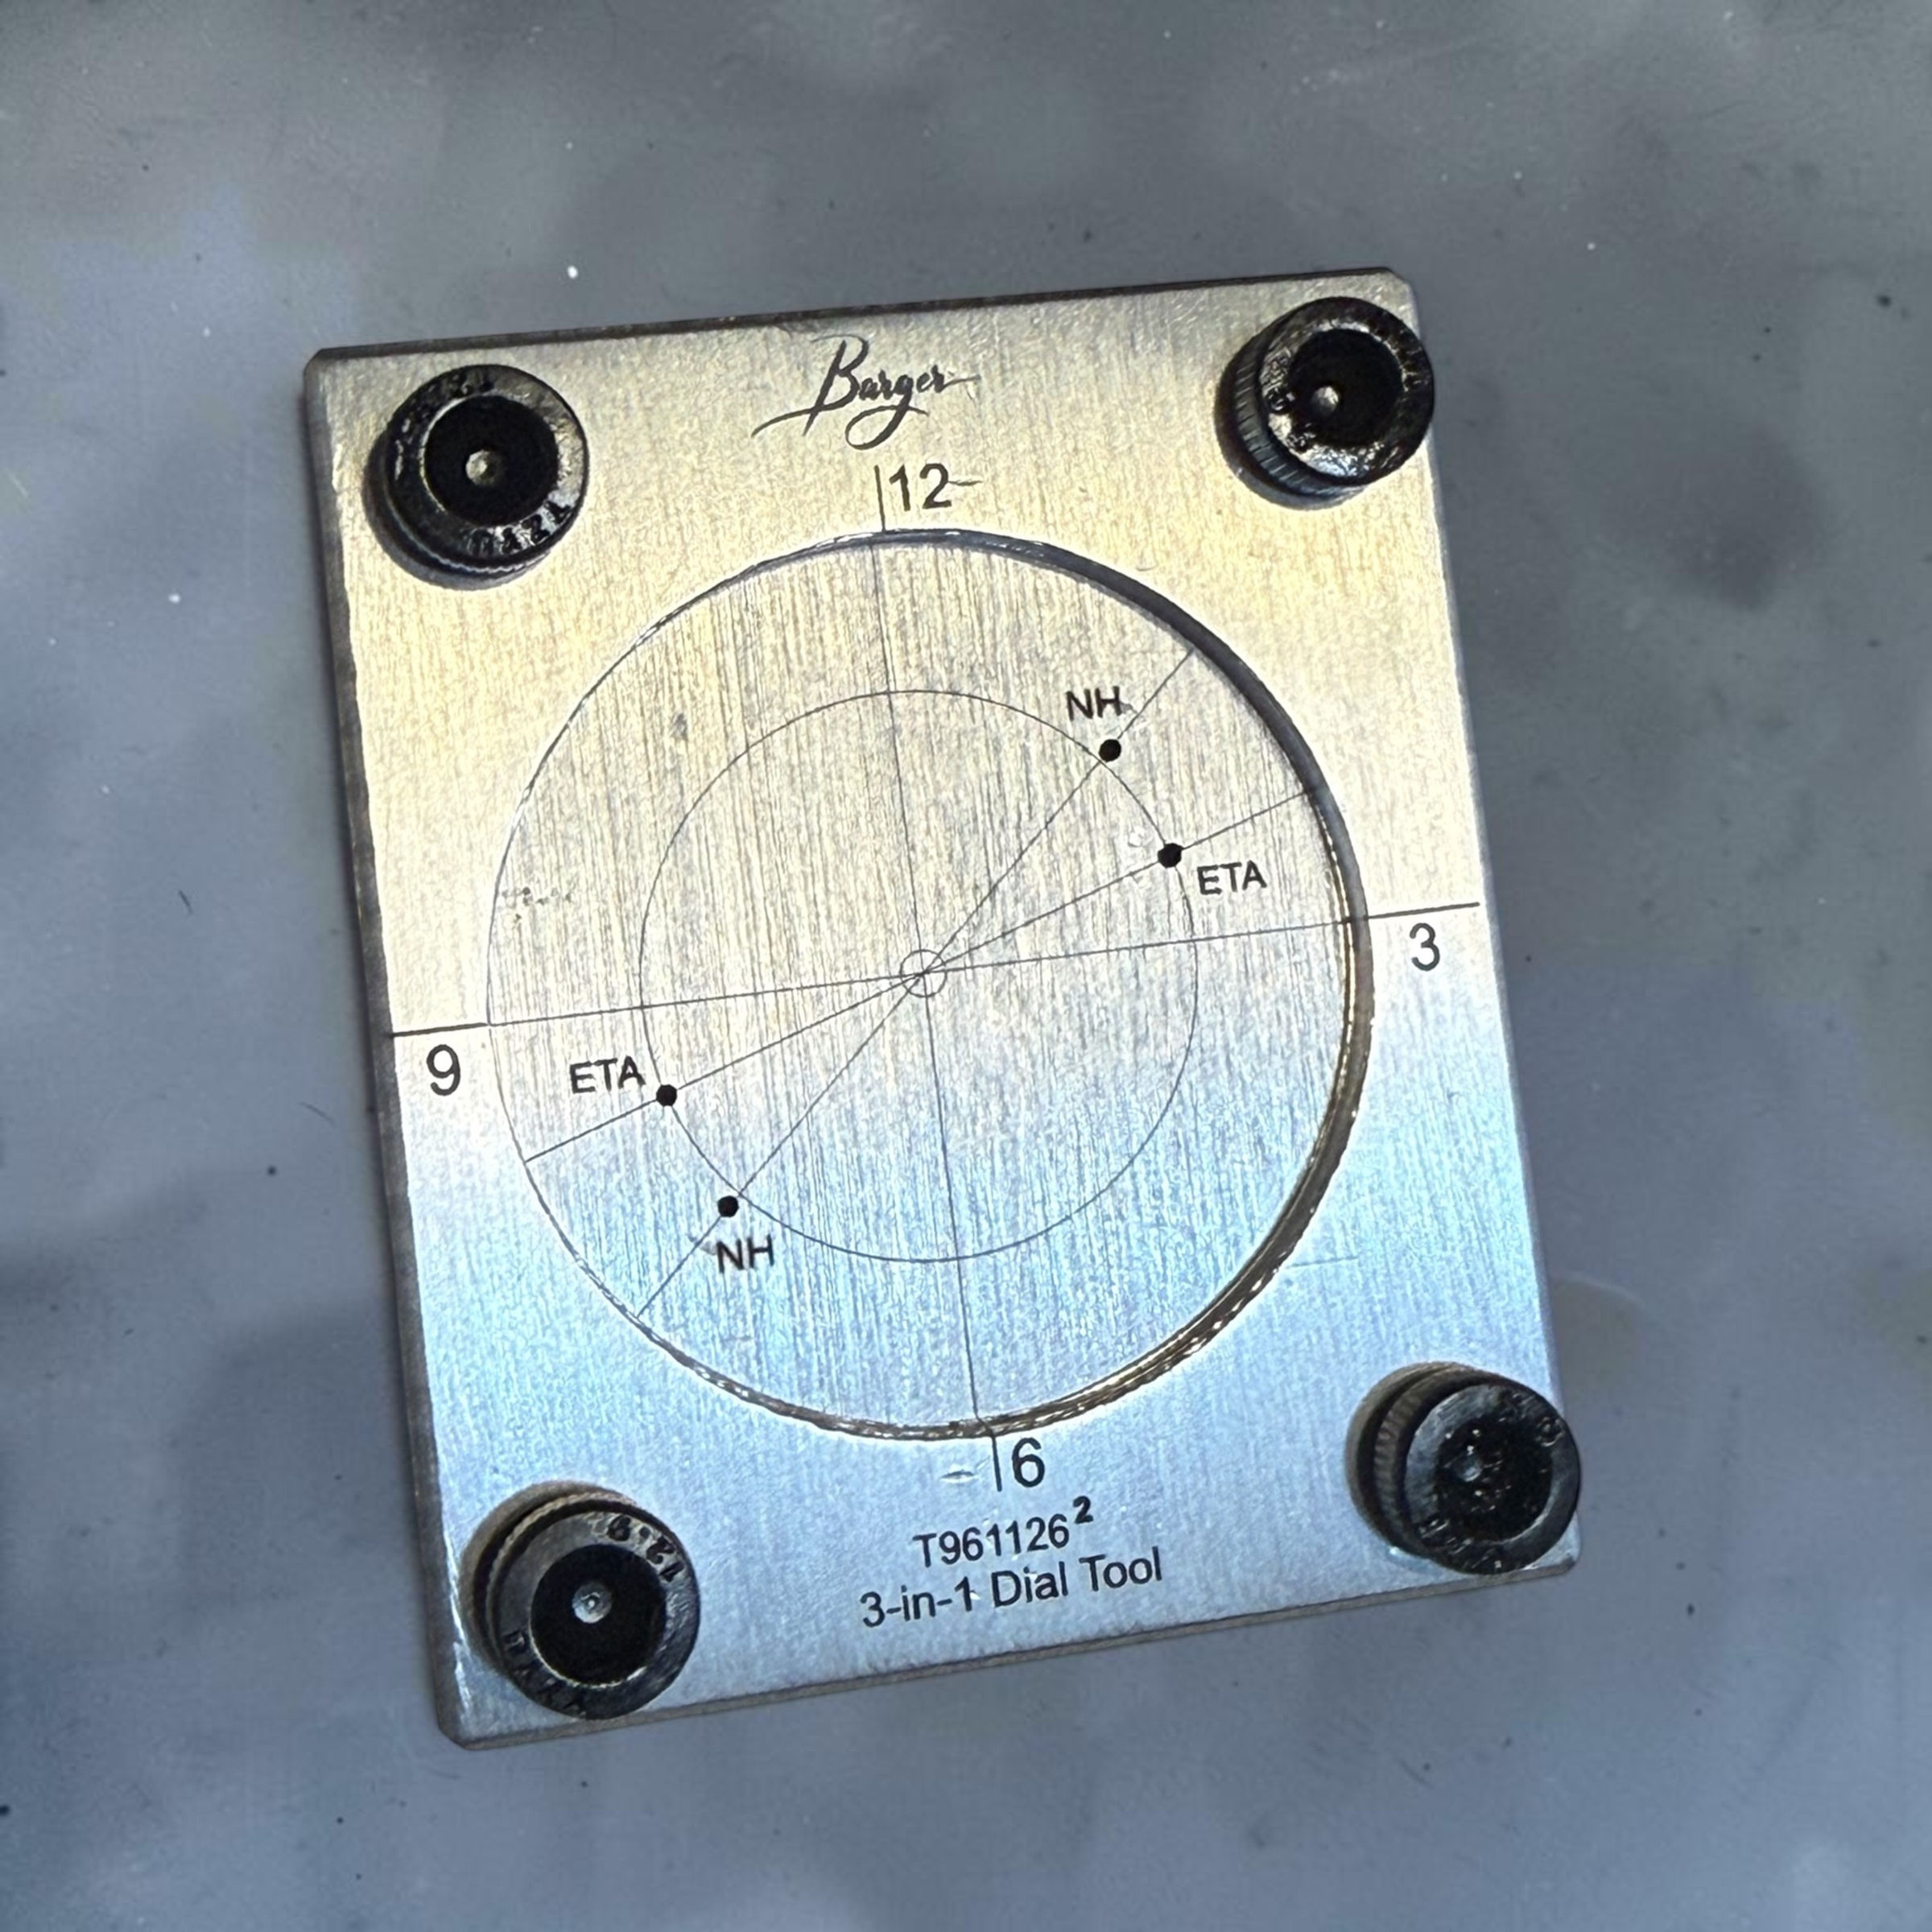

Included: one 3-in-1 Dial Tool (Made of aluminum, 4 thumb screws with hex style head)
This clamping, alignment, heat sink, and dial template tool will accomodate dial blanks with preinstalled dial feet and also dial blanks without feet, and provides a dial foot template for ETA (Sellita, STP, etc) and Seiko movements, needed to precision mark the dial foot locations for accurate placement and installation.
The opening on the clamping plate is a 36mm (I can go CNC any size opening you want if you want it smaller). If you want a second top plate with a specific opening size send me an email and I can make a second top plate for $20 at the same time I make your initial tool, or $35 if I need to make a one-off plate later (the setup on the equipment takes time).
The finished tool size is just under 50mm x 60mm (within a few millimeters) to the finished size. I precision locate and hand drill the template dial foot holes for the ETA 2824-2 and NH35 dial foot positions.
Please allow up to 5 to 7 business days for production before shipment.
Being a handcrafted tool, please note there will be some variances in size, appearance, and finish during the process due to these being handcrafted. As this is a production tool intended to be used as a workshop tool, it includes a 90 day limited warranty strictly for manufacture defects and is not warranted for any specific use or function. Wear and tear and any physical alterations to the tool are not included and damage resulting from such is not covered. This tool is custom made to order and there are no returns on this item.
Instructions For use: remove top plate (4 screws) and place dial blank centered on holder. If using a blank with dial feet, align the intended 3 oclock position with the 3 clock positon. Dials with NH35, ETA2824-2, or both will fit into the holder as designed. If using a very thin metal (less that .6mm) consider using a zinc oxide or thermal paste behind the dial back and the tool to provide a better thermal bond to more efficiently transfer heat.
Replace top plate and secure with screws in a uniform tighness; do not over tighten. A firm finger tightening of the screws for dialed feet dial is all that is needed. (The dial blank should be secured and not move under hand applied pressure.)
Each tool will have a LightBurn template file emailed to the original purchaser of the tool and this file is setup to provide an alignment template. You will adjust this file to your exact laser configuration the first time you use it. Place your dial art centered within the template file dial area and with the dial 3-in-1 tool aligned in the laser and calibrated it will provide a streamlined engraving process that yields exacting alignment. (Confirm alignment and adjust as needed before starting the laser engraving process.)
By using a physical setup of metal guides and the holding tool, and leaving the dial blank in the holder, and laser focus, and physical setup unchanged during production, one can make multiple placements into the laser and achieve a repeatable precision placement into the laser and duplicate engraving results. The video instructions are in the photos above for you to review.
To mark foot positions for blanks without feet use an end mill, drill bit, mechanical pencil lead, or other marking device of your choice to place a mark on the metal before removing from the tool holder. If needing to mark feet that were not produced while in the holder align those perfectly with the 12, 3, 6, and 9 hour markers and center the dial on the center, and then secure the dial using the 4 bolts. Mark the holes with preferred method. A 1/32” drill bit with a pin vise is a great way to mark the dial foot positions if you are using a blank without preinstalled feet.
Remove the dial and confirm markings and weld, glue, or use whatever dial affixing method preferred.
Note to exercise safety precautions: Be sure to incorporate all safety precautions recommended for your laser or machining equipment: wear safety equipment, and follow all safety operating procedures for any tools used with the 3-in-1 tool, to include eye protection. Never touch the tool during or shortly after laser operation as it may be very hot. Avoid laser engraving the tool unless you are intentionally modifying it. Adding a cooling fan or vortex airflow to the area being engraved is an excellent addition to laser engraving heat management.